Chaos Studio Overview
A lot of working in the IT Industry can feel like “Embracing the Chaos”, so much so that back in 2010 Netflix created a tool called “Chaos Monkey”. Chaos Monkey was created to randomly terminate production instances of their IT environment to test the systems were resilient in the event of a real outage, you can read more about Chaos Monkey here: https://netflix.github.io/chaosmonkey/
On the surface it is a simple idea but one that holds so much power, if you try to disrupt your own IT environment in this way then you can design it to withstand the Chaos!
Azure now has a feature called “Chaos Studio” in Preview which allows you to design fault experiments to test your workloads resiliency. Although its still in Preview the setup of it is really intuitive and already holds great benefits for organisations that already embrace Chaos Engineering as an ongoing operations approach or those new to the subject and what to dip their toe in the water with injecting Chaos Engineering principles on their Azure Cloud workloads.
Current Resource Support
The Microsoft Documentation has info on Resources that Faults can be applied to at this time: https://docs.microsoft.com/en-us/azure/chaos-studio/chaos-studio-fault-providers
But as the feature is still in preview I’m hoping these will get expanded out as it continues to be worked on
How to Set Up
Faults & Configuring Target Resources
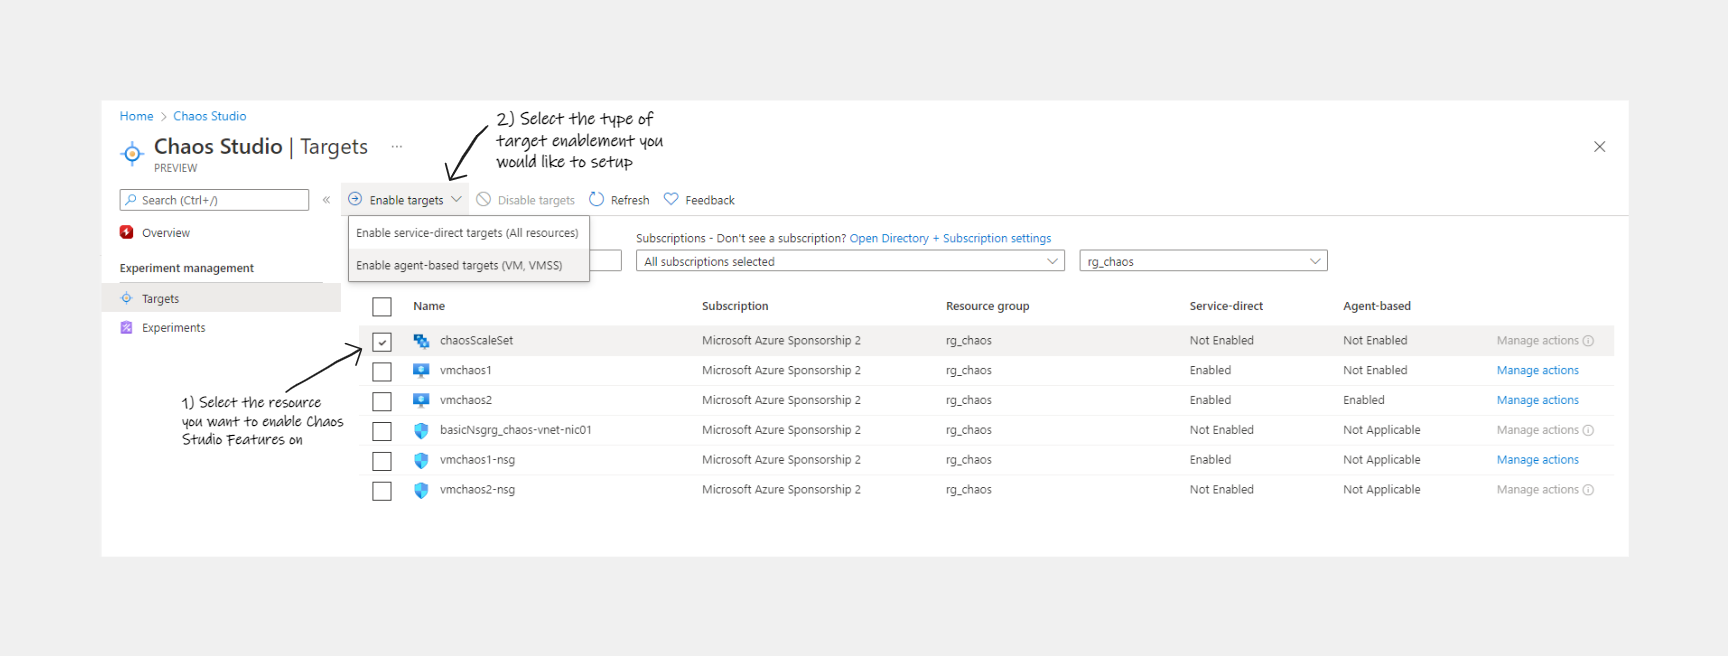
When you browse to the Chaos Studio section of the Azure portal you have 2 sections to explore, Targets & Experiments. 1st lets look at Targets. By enabling Targets is allows you to inject Faults into those resource. A full list of currently supported Faults can be found here be aware that if the Fault Provider is listed as Microsoft-Agent the resource requires Agent Based Target to be enabled.
Service Direct vs Agent Based Targets
There are 2 different ways (at the time of writing) to enable resources for Chaos Studio Faults, you can enable both on VMs & Virtual Machine Scale Sets but more info on the settings are as follows:
- Service Direct for all supported Resources Ability to inject faults without the need for additional agent install on VMs or PaaS Services.
- Agent Based for VMs and Virtual Machine Scale Sets
Allows for more granular faults to be injected. This includes CPU Pressure, Disk I/O Pressure to name a few.
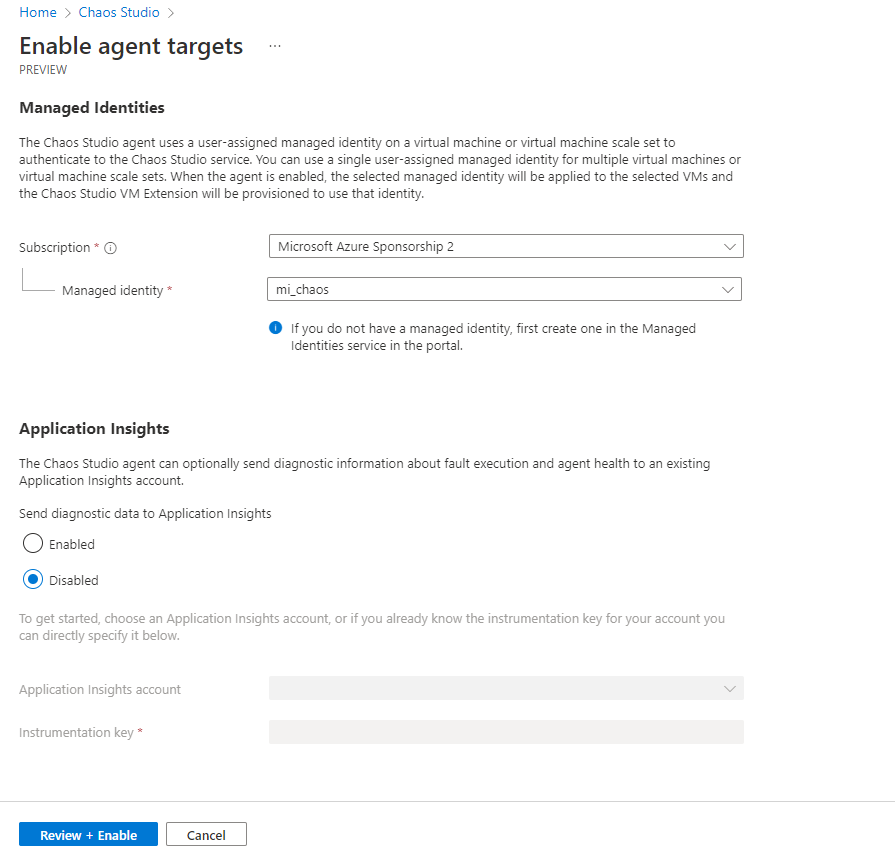
- Agent-based Targets requires a user-assigned managed identity that has been assigned to the target virtual machine or virtual machine scale set. If you do not have a user-assigned managed identity, you can follow these steps to create one. To assign to Identity check the documentation here
Enable Targets in Azure Portal
The setup for either of these options is accessed the same way:
- Service Direct will start the enablement process when you select it from the drop down above
- Agent Based will open a new blade which will ask you for the Managed Identity discussed above, skip Application Insights for now and select Review & Enable
Once complete you will be able to see on the Targets page in the portal the status of the enablement options set to “Enabled” depending on the options you selected. Selecting “Manage actions” on the right will also show a list of avilabale faults that can now be enabled as we move on to Experiments
Create Experiments
Once you have resources setup as Targets, we can get into creating Chaos Experiments.
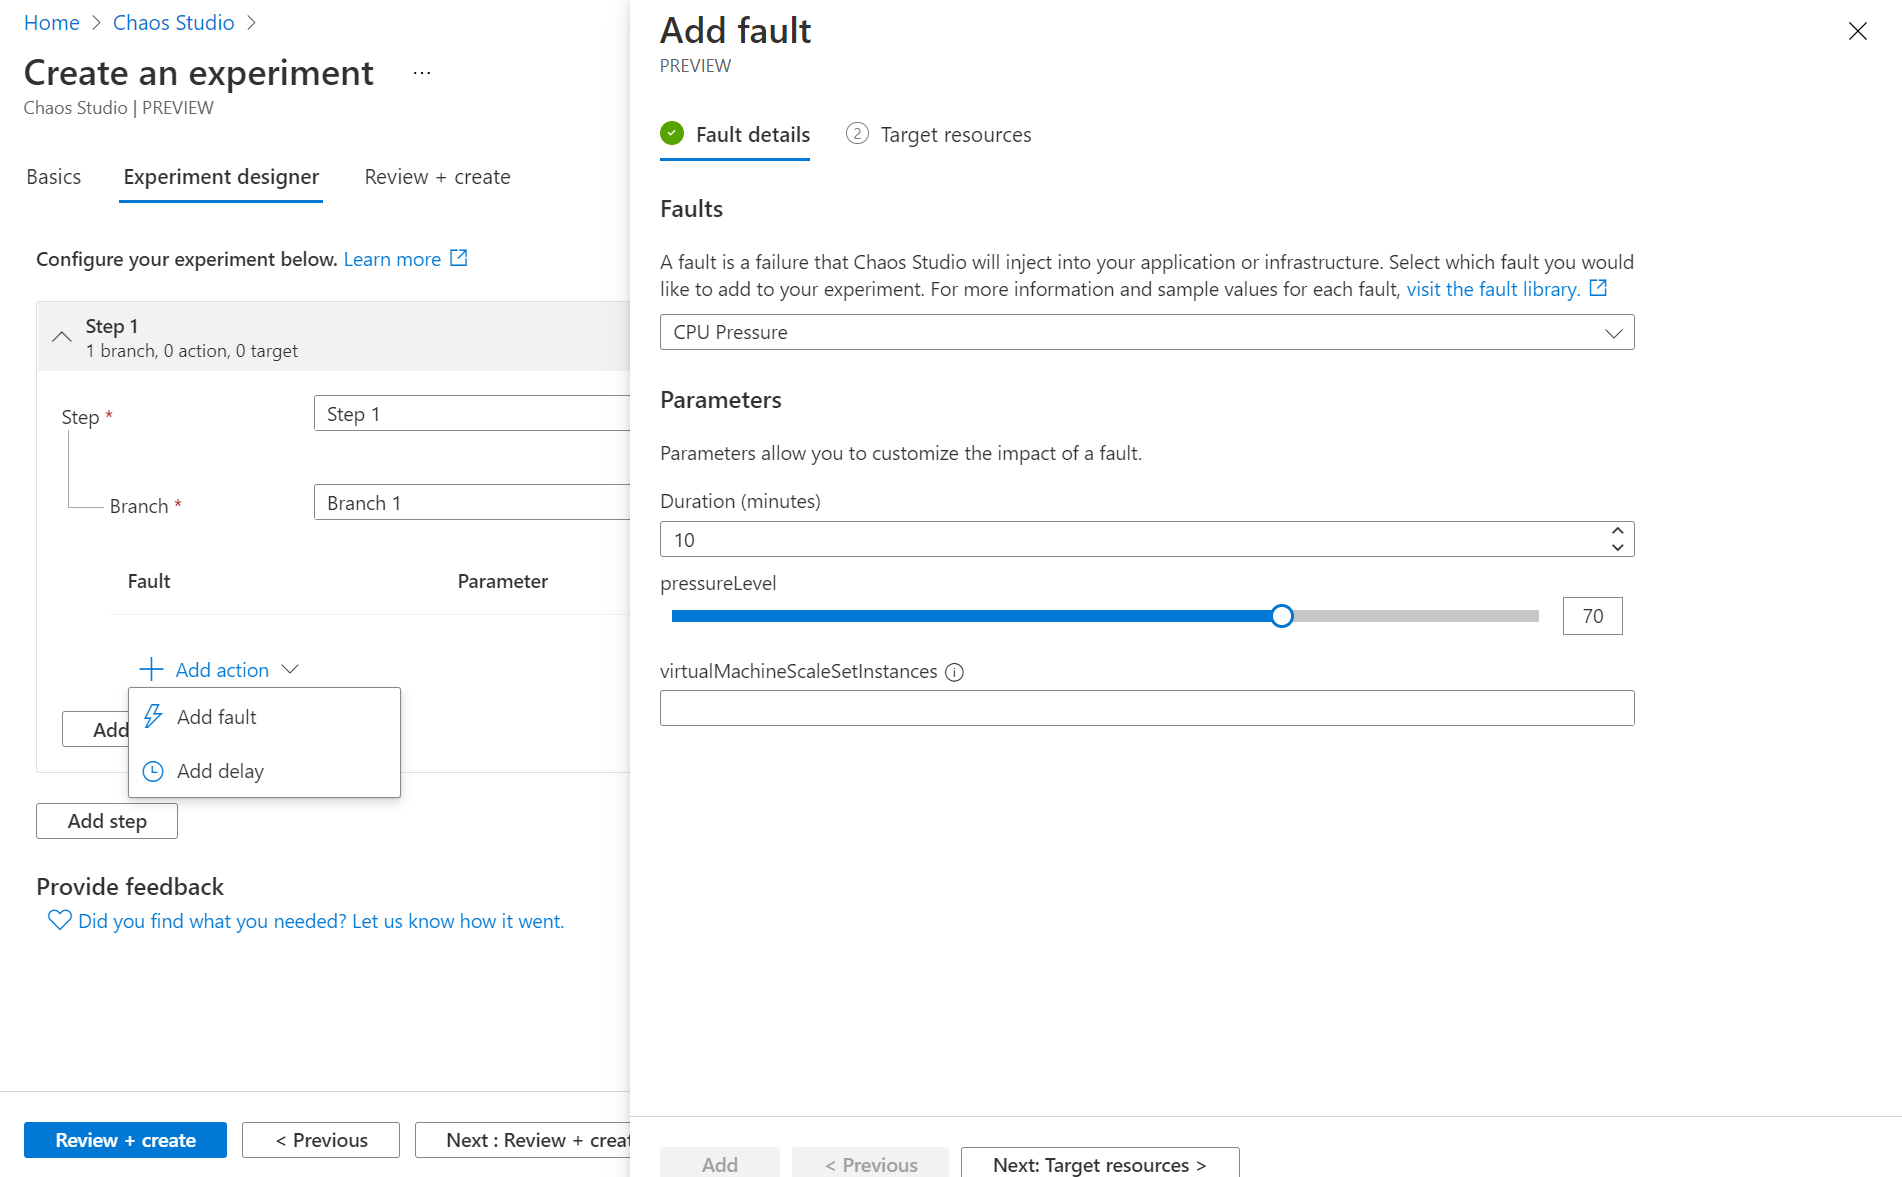
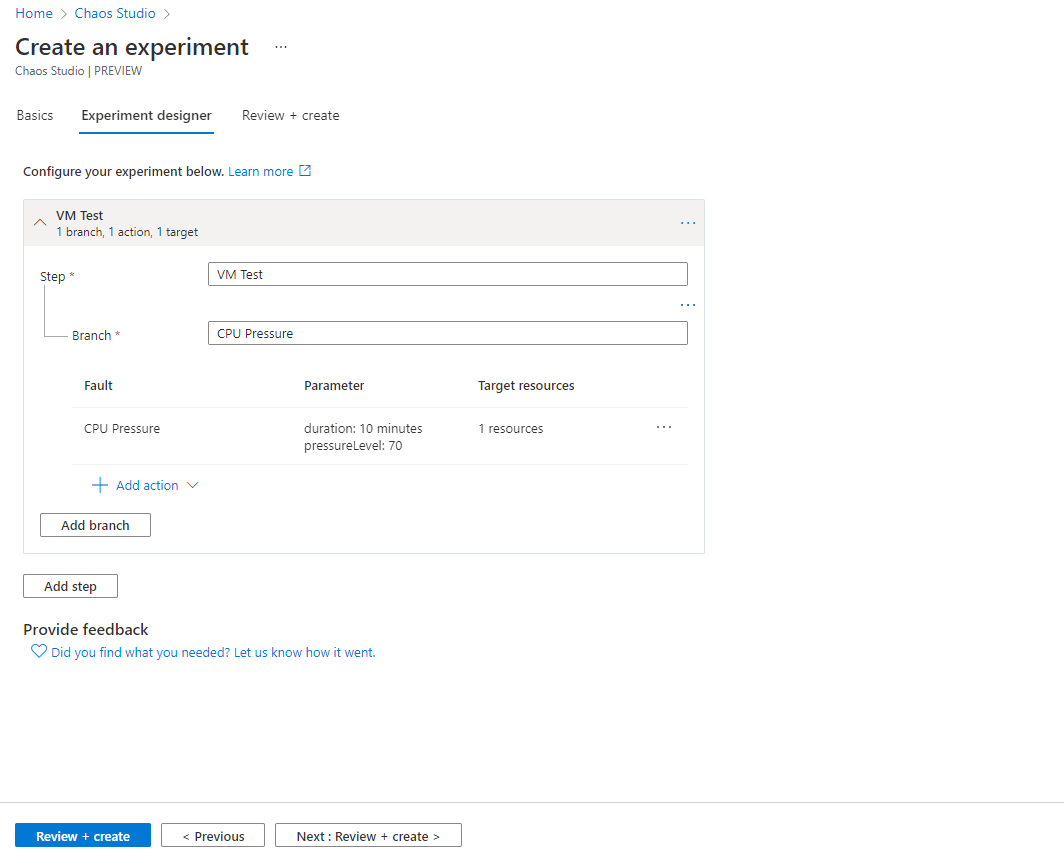
Navigating back to the Chaos Studio home page in the portal select Experiments and then Create. Define your Resource Group, Name and Location and then click next to access the Experiment Designer. From here to you can create complex experiments and sequences of fault injection adding multiple steps and branches to execute. For this example we will keep it simple and create an Experiment that increases the CPU Pressure on the VM by 70% for 10 minutes:
NOTE - at the time of writing you define the fault before you select the resource it applies to, personally I think it would make a bit more sense to have these options the other way round but just be aware you may have to check the fault you have selected is valid for the resource on the Target Resource page.
In the example above we select a virtual machine with Agent Based Targeting as the resource:
Give the Experiment Access to the Resource
One more step before we can run the Experiment, you need to give it permission to the resource. The Microsoft docs here walk through this really well but make sure to check the recommended permission setting for your resource in this link too: Recommended role assignments for Experiments
Run Experiments
Once created you’ll be able to see the Experiment listed in the portal. And when permissions have been assigned you can select the Run option to start the experiment. Experiments can be stopped once started you aren’t tied into completing it once its kicked off. The History section of the Experiment blade gives log information on past and present runs of the Experiment.
CPU Pressure to 70% Example
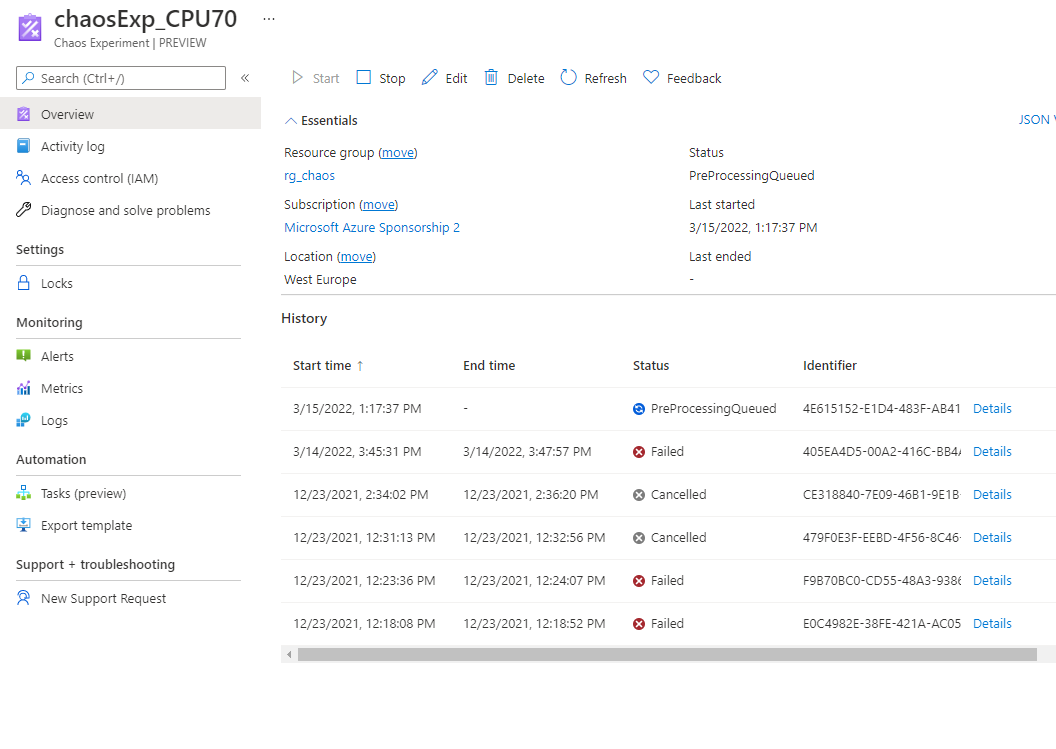
If we select Start we can see the a new entry appear in History showing the Experiment queued to start:
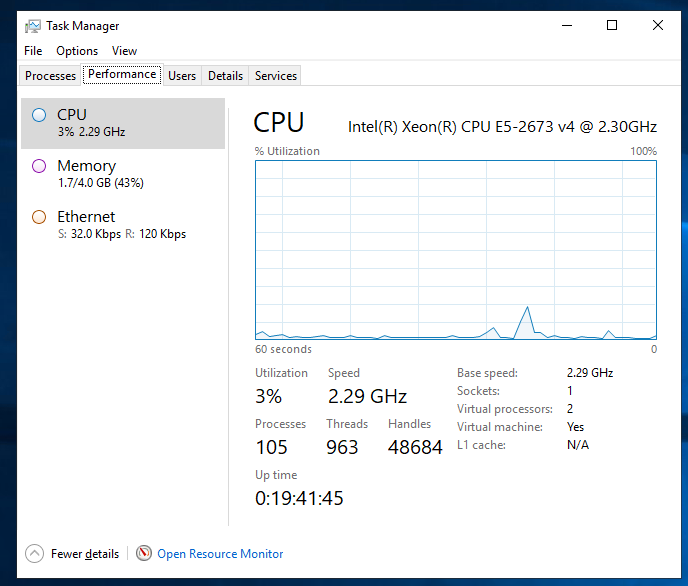
CPU on the VM before the Experiment Starts:
Selecting Details on the History section will give more info on the running Experiment which will match up to the Steps and Branches you created originally:

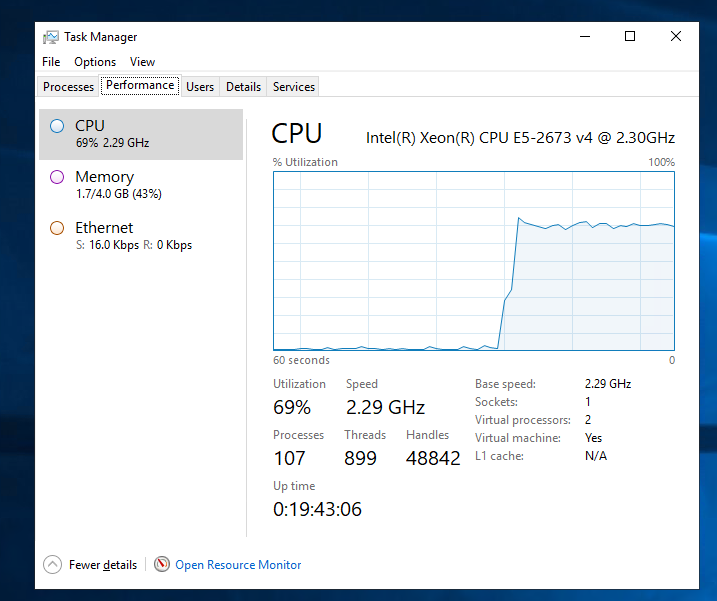
Once the Experiment is Running we can see the CPU increase:
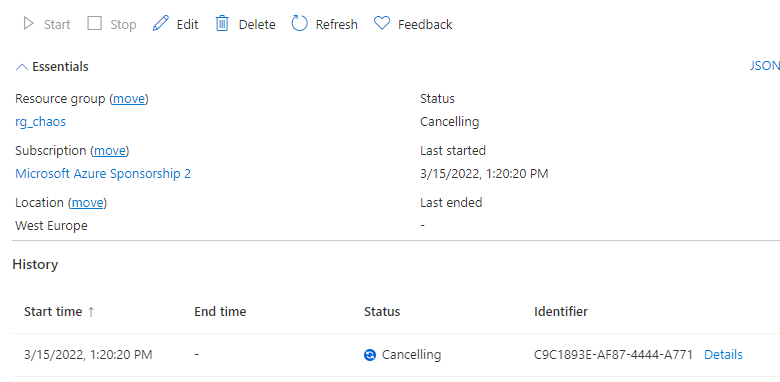
Selecting the Stop button will cancel the Experiment:
And as the Experiment is cancelled we can start to see the CPU pressure return to normal:
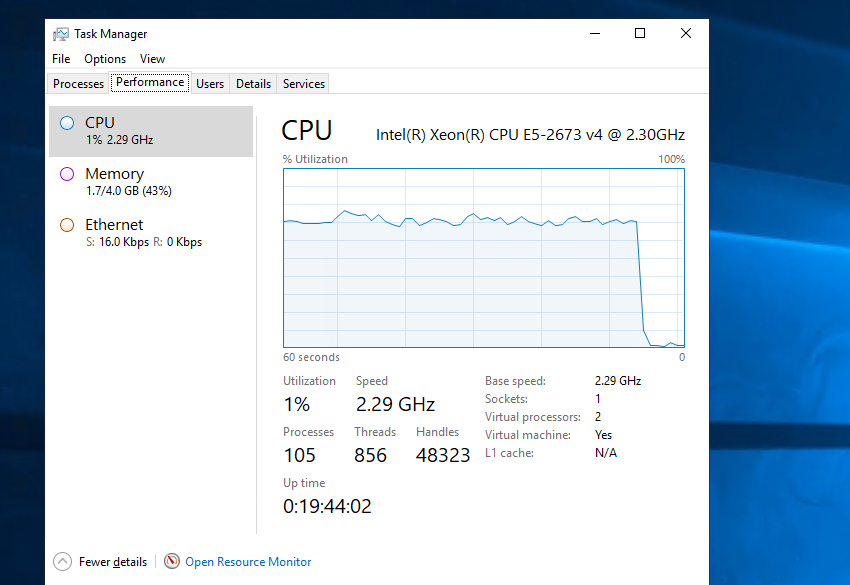
And you can see the History of the previously ran Experiment back in the Portal:
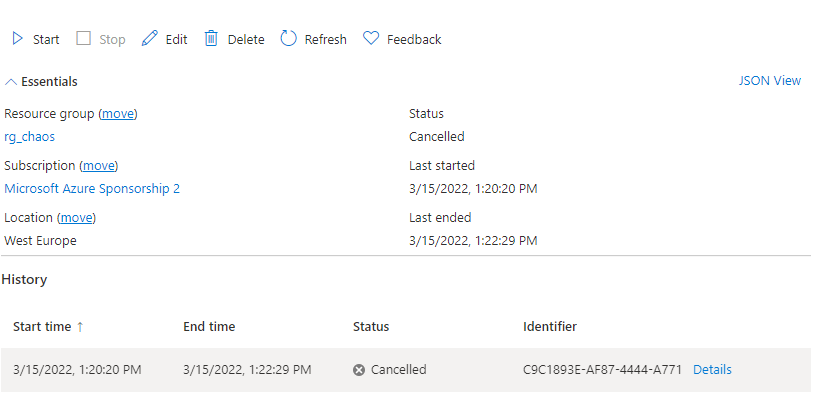
In the above example cancelling took less than a minute, would need to be tested with different types of fault but a great example of how quickly you can stop if you need to stop the test for any reason.
Troubleshooting
When I 1st looked into this I came across an odd error were a VM I had enabled was not showing as a target resource, this was most likely due to be forgetting to assign the Managed Identity I had created to the VM so if you are enabling Agent Based Targets don’t forget to create AND ASSIGN the Managed Identity to your targets resource.
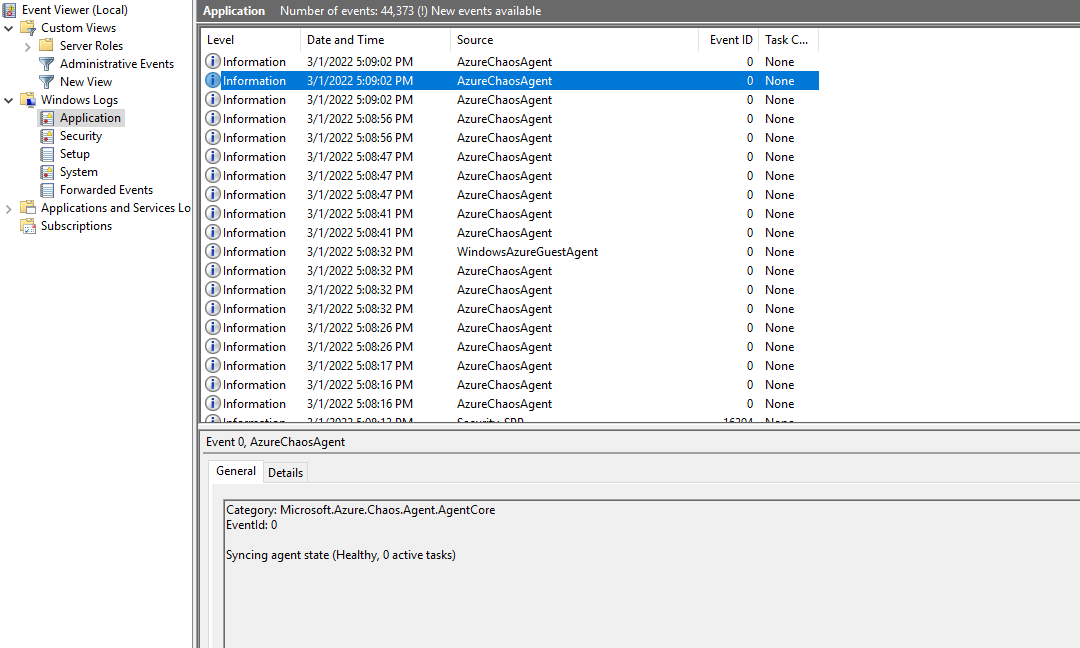
Before I realised that though I went down the route of checking the Event Logs on the VM to ensure the Chaos Studio Agent was up and running ok. You can do this by searching for AzureChaosAgent in Application Logs in the Event Viewer of the VM you have tried to enable:
What’s Next
This post has acted as an Overview of what you can do and how to set up Targets and Experiments but ideally you would want to build upon this to make sure that whatever fault you inject, your solution is built resiliently to handle it. In our CPU Pressure example, I’ve ran that on a single VM but you could test it on a VM Scale Set to ensure that it scales out to accommodate the compute strain as CPU constraints are hit while the Experiment runs.

